
Snack Pellet Dryer Maintenance: Belts, Fans & Heating Elements Manufacturer
- By Jinan MT Machinery

Most operators assume loose belts just slip, but in reality, they cause uneven heat distribution that creates hidden moisture pockets, silently ruining batch consistency.
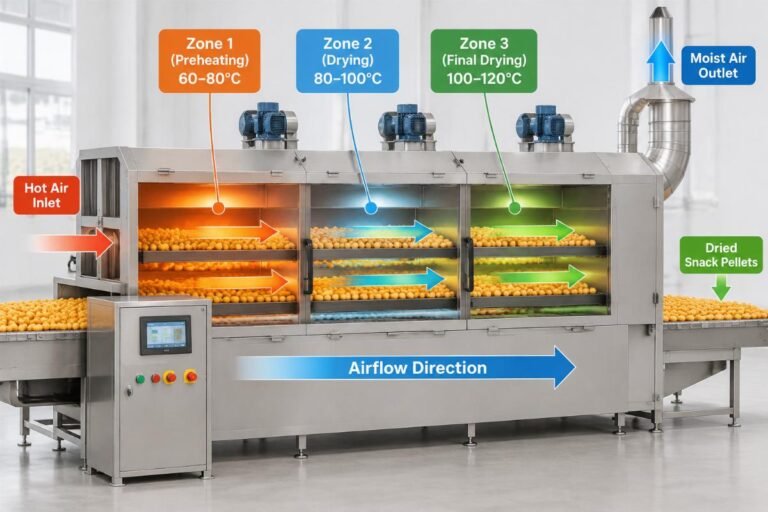
Mastering snack pellet dryer maintenance requires a proactive approach focusing on three critical areas: precise belt tension adjustment to ensure uniform transit, rigorous fan airflow optimization to eliminate uneven drying zones, and systematic heating element resistance testing to prevent localized scorching before total failure occurs.
I still remember the scorching heat radiating from a dryer chassis in Ningbo years ago. The conveyor belt had snapped, the heating elements were dry-firing, and an entire batch of premium pet treats had turned into useless black carbon. The client was furious, pointing at the ruined product covering the factory floor. I crouched beside the烫 (scalding) machine housing, checking the fan rotation speed, only to realize the drive ratio was completely mismatched. Since transitioning from on-site installation to consulting for production lines, I always inspect the physical floor before discussing theoretical principles. Belt tension, fan static pressure, and heating element decay are the exact details that dictate whether your equipment runs smoothly or breaks down unexpectedly. Proper snack pellet dryer maintenance is not just about fixing what is broken; it is about predicting failures before they impact your bottom line.
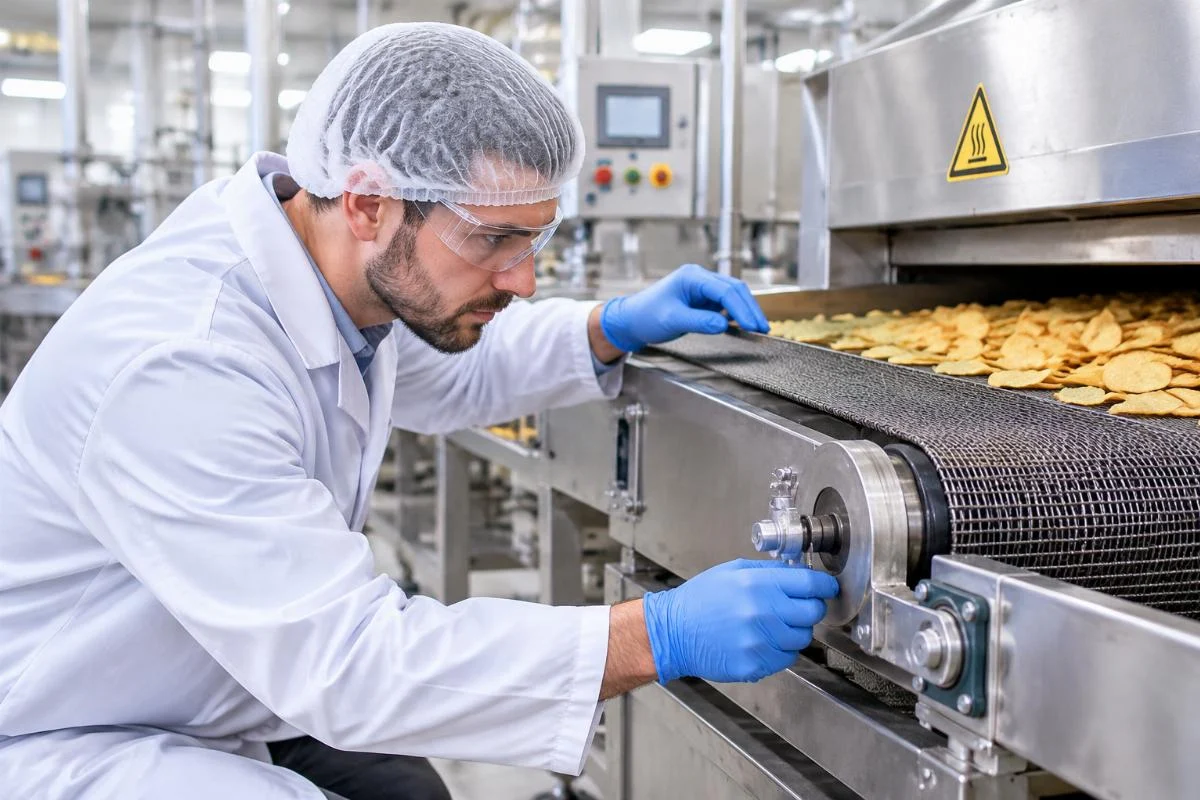
Transitioning from reactive firefighting to predictive care begins with understanding the mechanical and thermal dynamics of your drying system.
How to Inspect and Adjust Dryer Belt Tension?
Proper tension prevents slipping and ensures uniform pellet transit through the thermal zones.
When a belt loses tension, the immediate assumption is that it will simply slip on the drive roller. However, the actual consequence is far more insidious. A slipping belt alters the transit speed of the pellets through the heating chambers, causing severe uneven heat distribution. This leads to hidden moisture pockets in the final product, which drastically reduces shelf life and invites microbial growth. Effective snack pellet dryer maintenance demands treating belt tension as a dynamic variable rather than a set-and-forget parameter.
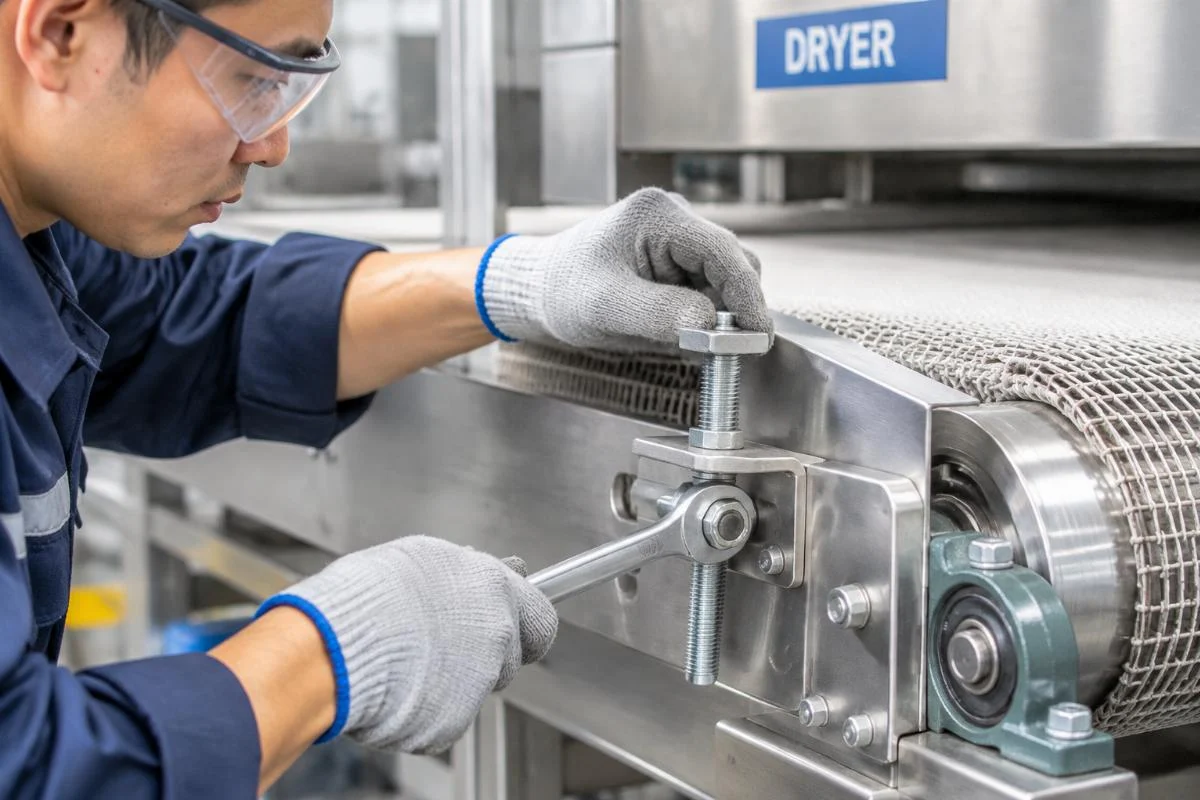
To execute a flawless dryer belt tension adjustment, follow these systematic steps:
- Isolate and Cool Down: Lock out the main power supply and allow the chamber to reach ambient temperature. Thermal expansion alters belt metrics, so checking tension while hot yields false readings.
- Measure Deflection under Load: Apply a standardized moderate force to the center of the belt span. The deflection should yield a slight give, indicating optimal tension without over-stressing the motor bearings.
- Check Roller Alignment: Misaligned rollers cause the belt to track poorly, leading to edge fraying. Use a straight edge across the roller faces to ensure perfect parallel alignment.
- Adjust Tensioning Screws: Turn the tensioning bolts on both sides equally. Uneven adjustment will skew the roller, immediately ruining the tracking.
- Run and Observe: Power the system empty and watch the belt tracking. Make micro-adjustments until the belt runs perfectly centered.
I once consulted for a snack food startup in Latin America that kept complaining about soggy centers in their corn puffs. They had replaced the belt multiple times. Upon arrival, I found the tensioning mechanism was seized on one side, causing the belt to run at a slight angle. The transit time varied by several seconds across the belt width, which was enough to leave the center of thicker pellets under-dried. We cleared the seized mechanism, realigned the rollers, and the moisture content stabilized immediately. Utilizing food-grade stainless steel components, like the 304 and 316 stainless dryer parts provided by Meiteng, significantly reduces the risk of such mechanical seizures caused by corrosion and sugar buildup.
What Causes Fan Airflow Drop and How to Fix It?
Clearing debris and checking motor bearings restores optimal static pressure for even drying.
Airflow is the invisible workhorse of the drying process. When industrial dryer fan troubleshooting reveals a drop in airflow, the immediate reaction is often to increase the motor speed. This is a critical mistake. Over-speeding a compromised fan merely increases energy consumption and noise without solving the underlying restriction. The real issue usually lies in static pressure loss caused by debris accumulation or bearing friction, which creates uneven drying zones across the belt width.
Addressing fan airflow drops requires a methodical approach:
- Inspect Inlet and Exhaust Filters: Accumulated dust and fine product particles restrict intake. Clean or replace filters according to your production environment’s dust load.
- Clean the Fan Impeller: Sticky residues from flavor coatings or natural oils can build up on the impeller blades, altering their aerodynamic profile and drastically reducing airflow. Carefully scrape and clean the blades without damaging the balance.
- Check Motor Bearings and Vibration: Excessive vibration indicates bearing wear. Use a vibration analyzer to detect early-stage bearing faults before they seize completely.
- Verify Drive Belt Condition: If the fan is belt-driven, ensure the fan drive belt is not slipping, which directly translates to reduced RPM and airflow.
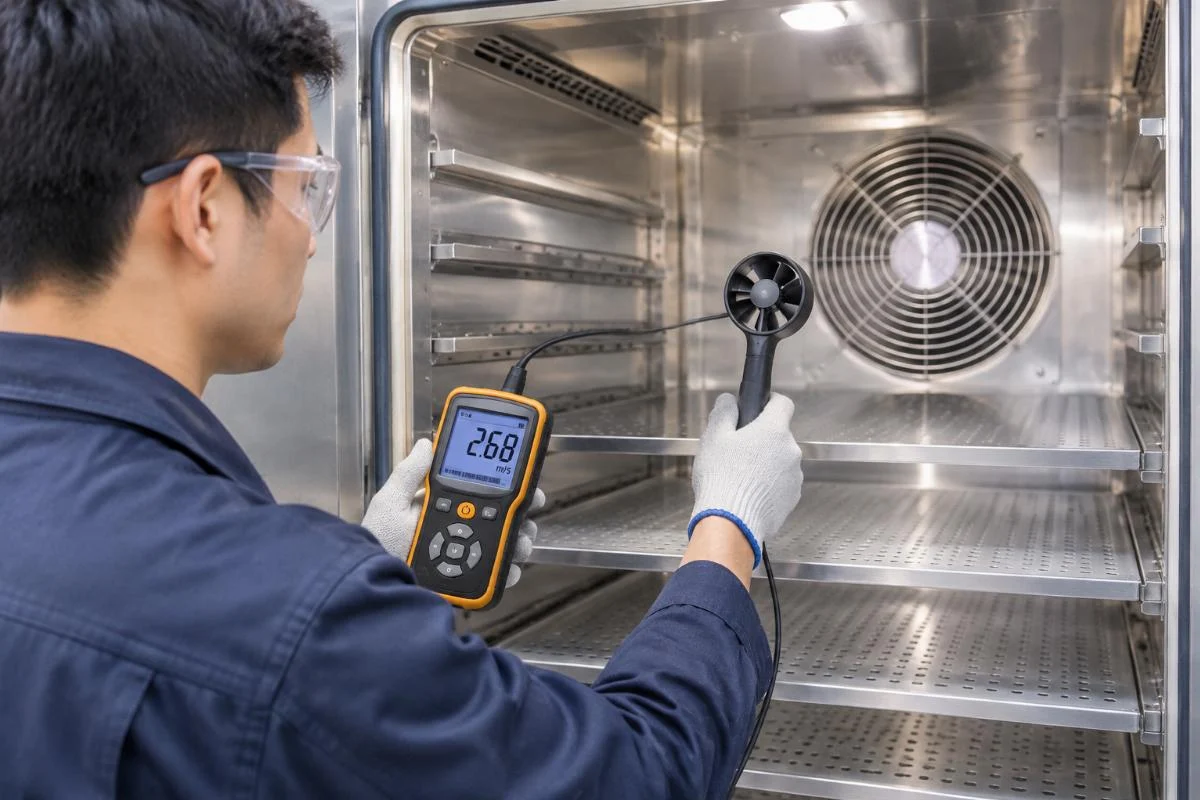
- Measure Airflow Distribution: Use an anemometer at various points across the drying chamber to ensure uniform air distribution.
A contract manufacturer in Southeast Asia experienced severe uneven drying, with one side of the belt producing perfectly crisp snacks while the other side remained soft. Their operators assumed the heating elements on the soft side were failing. During a comprehensive snack pellet dryer maintenance audit, we discovered that the fan impeller was heavily coated with hardened oil residue from a previous product run. This imbalance not only reduced the total airflow but also skewed the air distribution ducts. After thoroughly cleaning the impeller and recalibrating the dampers, the drying uniformity was fully restored.
How to Test Heating Elements Before They Fail?
Measuring electrical resistance identifies decay before it scorches the product.
Many assume heating elements fail suddenly, plunging the dryer into a cold state. In reality, gradual resistance increase silently ruins product texture long before total electrical failure occurs. As heating elements age and oxidize, their electrical resistance changes, altering the heat output and creating localized hot or cold spots. This gradual decay is a primary target for rigorous snack pellet dryer maintenance, as it prevents localized scorching that ruins batch quality.
To catch this silent decay, implement a strict heating element resistance testing protocol:
- Disconnect Power and Isolate: Ensure the heating zone is completely de-energized and locked out. Disconnect the wiring from the element terminals to avoid parallel circuit readings.
- Measure Baseline Resistance: Use a calibrated multimeter to measure the resistance across the element terminals. Compare this reading against the manufacturer’s original baseline specifications.
- Calculate Deviation: A significant increase in resistance indicates internal thinning or oxidation. Even a moderate deviation can cause the element to draw less current, reducing heat output and creating cold spots.
- Check Insulation Resistance: Use a megohmmeter to test the insulation resistance between the element terminals and the ground. A drop in insulation resistance indicates moisture ingress or internal degradation, posing a severe safety hazard.
- Track Lifespan and Replace Proactively: Maintain a log of resistance readings for each element. When the resistance drifts beyond acceptable thresholds, replace the element before it affects product quality.
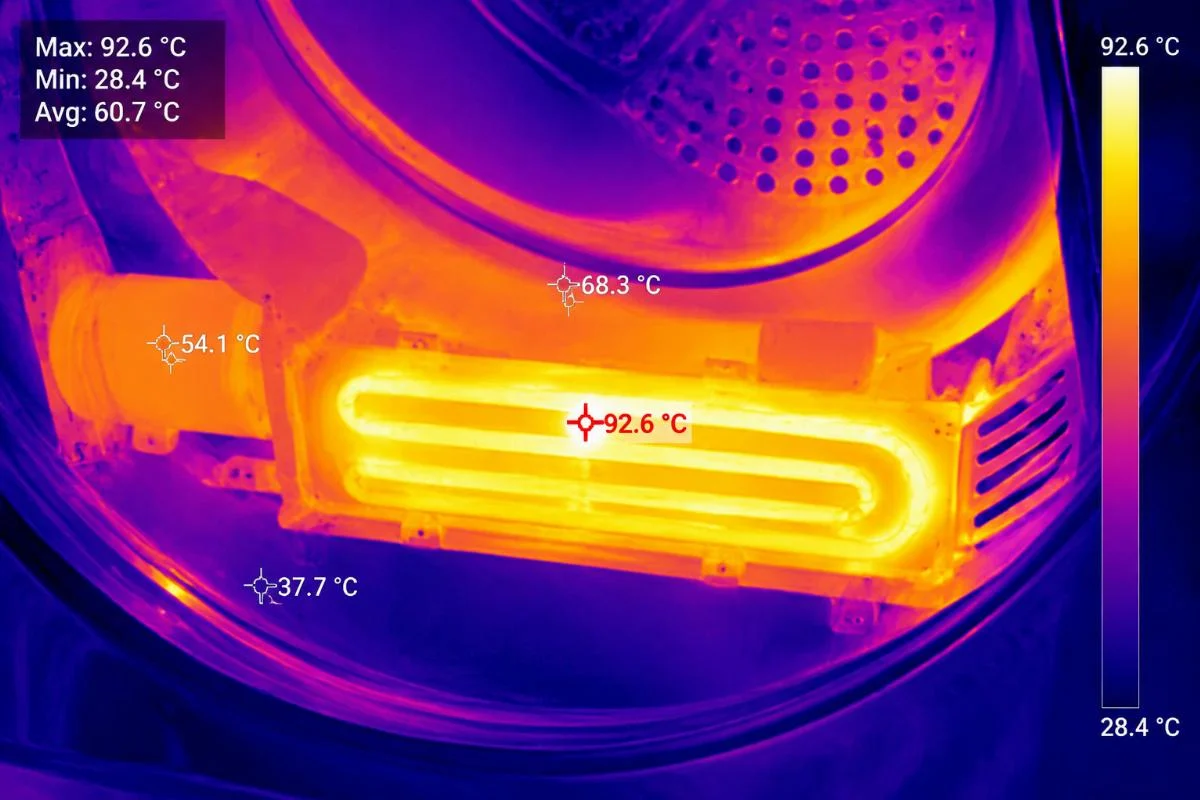
During an installation commissioning for a plant-based protein startup, the client noticed occasional dark spots on their textured vegetable protein pellets. They suspected the product formula was inconsistent. However, infrared thermography revealed a distinct cold spot in the second drying zone. Resistance testing showed that a group of heating elements had degraded significantly, drawing less power and failing to maintain the required thermal profile. By replacing these decaying elements and implementing a regular resistance testing schedule, the startup eliminated the scorching issue and stabilized their product color. Meiteng’s integration of high-quality, food-grade heating components ensures that replacement parts meet strict sanitary and thermal efficiency standards.
When to Schedule Comprehensive Dryer Overhauls?
Aligning part replacements with production shifts maximizes equipment uptime.
Reactive maintenance is expensive. Waiting for a component to fail catastrophically results in unplanned downtime, rushed emergency repairs, and potential product loss. The most effective snack pellet dryer maintenance strategy involves scheduling comprehensive overhauls during planned production gaps. This proactive approach allows for the systematic replacement of wear parts, deep cleaning of internal components, and recalibration of all sensors and drives without the pressure of an immediate production deadline.
Planning a comprehensive overhaul requires careful coordination:
- Analyze Production Calendars: Identify natural lulls in the production schedule, such as between major product runs or during seasonal downtimes.
- Audit Wear Parts Inventory: Review the consumption rates of belts, bearings, filters, and heating elements. Ensure all necessary replacement parts are on-site before the overhaul begins.
- Schedule Deep Cleaning: Plan for extensive cleaning of the drying chamber, ductwork, and fan housings to remove accumulated residues that regular cleaning misses.
- Recalibrate Sensors and Controls: Verify the accuracy of temperature, humidity, and airflow sensors. Recalibrate or replace any sensors that show drift.
- Conduct Operator Training: Use the overhaul period to train operators on the updated maintenance protocols and the specific nuances of the newly installed components.
A cereal producer in the Middle East struggled with frequent, short-duration breakdowns that fragmented their production shifts. They were constantly fighting fires. We helped them transition to a scheduled overhaul model, aligning major component replacements with their planned weekend shutdowns. By proactively replacing belts and servicing fans before their expected end-of-life, they virtually eliminated unplanned downtime. Furthermore, utilizing Meiteng’s on-site operator training during these overhauls ensured their team understood the critical importance of daily inspections, transforming their maintenance culture from reactive to predictive.

Conclusion
Proactive maintenance transforms drying equipment from a liability into a reliable asset.
Mastering snack pellet dryer maintenance through precise belt tension adjustment, rigorous fan airflow optimization, and systematic heating element resistance testing prevents catastrophic product loss and ensures consistent moisture removal. By aligning comprehensive overhauls with production schedules, food manufacturers can maximize equipment uptime, guarantee product quality, and build a resilient, efficient production line.
Equipment Mentioned in This Article
 3D papad machine
3D Snack Pellet Production Line Fried Extruder Machine
3D Snack Pellet Production Line for Starch-Based Snacks — twin-screw extrusion processes potato, cassava, and corn starch into diverse shapes.… View Machine Details 3D papad machine
Fully Automatic 3D Snack Pellets Extruder Making Machine for Chips
Chips 3D Snack Pellet Extruder Line for 2D/3D Shapes — co-rotating twin-screw extrusion processes potato and cassava starches into papad,… View Machine Details 3D papad machine
2D 3D Snack Pellet Production Line Manufacturer
2D 3D Snack Pellet Production Line for Diverse Shapes from Starches — twin-screw extrusion handles wheat, corn, and cassava. The… View Machine Details 3D papad machine
Automatic 3D Pellet Extruded Corn Puffed Snack Food Production Line
3D Pellet Extruded Snack Food Production Line for Starch Pellets — processes potato, corn, and cassava starch into papad and… View Machine DetailsRelated Applications

Engineering Perspective
An In-House R&D Team Behind Every Line
Jinan MT Machinery develops its process technology in-house. The team concentrates on the four areas that decide pellet shape, expansion and line stability.
- Expansion technology
- Twin-screw extrusion
- Die design
- PLC/MCC automation
Related Articles
 Nov 17, 2026 · Installation & Maintenance
Fix Snack Pellet Cracking in Drying: Twin-Screw Extruder Manufacturer
Snack pellets cracking during drying is rarely an extrusion fault but a thermal bottleneck caused by rapid surface moisture evaporation. Implementing a multi-zone gradual… Read This Article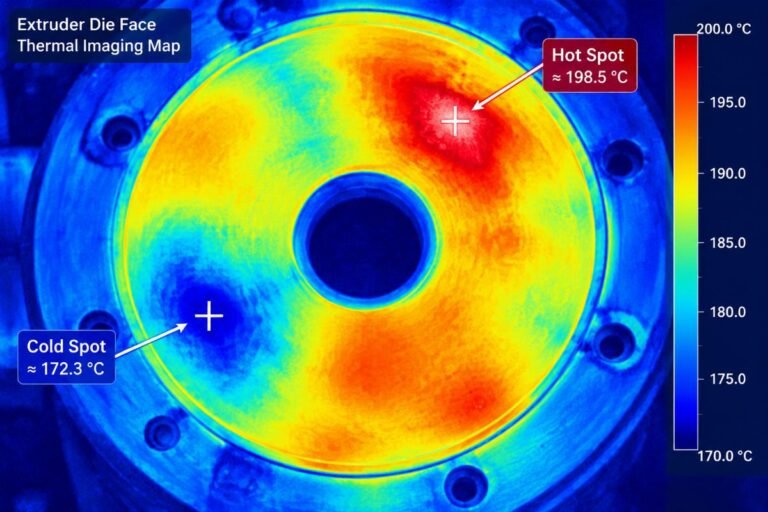 Nov 17, 2026 · Installation & Maintenance
Fried Pellet Chips Extruder Manufacturer: Fix Uneven Expansion
Troubleshooting uneven expansion fried pellet chips requires addressing mechanical installation deviations and thermal inconsistencies instead of adjusting recipes. Verify die temperature sensor alignment, inspect… Read This Article Nov 17, 2026 · Installation & Maintenance
Extruder Screw & Barrel Wear in Pellet Lines: Replacement Guide from Manufacturer
Detect extruder screw and barrel wear early by tracking motor amperage spikes before internal clearance expansion ruins pellet quality and triggers costly downtime. Replace… Read This ArticleFree Process Check
Send Your Recipe for a Process Check
Jinan MT Machinery engineers review your recipe and return a free process plan within 24 hours. Tell us the product, output, raw material, local voltage and heat source.
Send Your Recipe on WhatsApp